Filters and Radio Mode added to UK Radio Streamer for DivX Connected

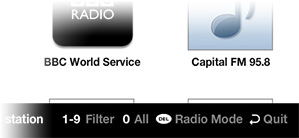
With a growing selection of radio stations available via the UK Radio Streamer, you can now filter by name using the number buttons of your DivX Connected remote control.

There’s also a new Radio Mode available via the DELETE button for anyone wanting background music without the glow of their TV.

New features will be added automatically for existing users, so there’s no need to manually upgrade or re-install the plug-in.

Don’t have the UK Radio Streamer?

Filters and Radio Mode added to UK Radio Player for DivX Connected

UK Radio Streamer for DivX Connected

Introducing the UK Radio Streamer for DivX Connected

The UK Radio Streamer enables you to listen to a wide range of radio stations through your DivX Connected set-top box, including Absolute, Capital, Heart, Kiss and Magic to name but a few.

New stations and features will be added automatically, so open the plug-in regularly to see what’s new!

Can’t find your favourite station?

If your favourite station isn’t listed, and it’s available online as an an MP3 or AAC/AAC+ stream, let us know by adding a comment to this post and we’ll see what we can do!

Wherever possible, please post the URL of the feed itself, rather than a link to a website or M3U/PLS playlist.

Download & Find out more

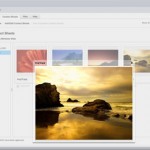
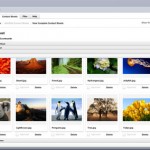
Introducing Mesmotronic ImProve online image approval

A number of our clients were complaining that they were spending literally hours of their time every day creating contact sheets in Photoshop for their clients to review and approve. Add to that the time spent sending emails back and forth listing the images they did or didn’t want to use and that’s a lot of time and money down the drain.

But now there’s a solution: Mesmotronic ImProve.

Mesmotronic ImProve is an online image approval service for photographers and other creative industry professionals.

By simplifying the process of creating and sharing contact sheets with your clients, Mesmotronic ImProve speeds up the proofing process, saving you both time and money.

So, whether you’re a wedding photographer who needs to know which shots to include in an album, a designer wanting to confirm which images to include in a web or poster campaign, or any other creative professional who wants to save time on the proofing process, Mesmotronic Improve is designed to make your life easier.

With Mesmotronic ImProve it really is as easy as Upload, Approve, Review.

Click here to find out more about Mesmotronic ImProve and create a FREE account

ConnectedVNC 0.95 now available!

The latest release of ConnectedVNC adds additional remote control functionality:

  • Tap ARROWS to move slowly
  • Press and hold ARROWS to move fast
  • Press DOT to pick-up (start drag)
  • Press DOT again to drop (end drag)

While dragging, e.g. moving an icon or window, your mouse cursor will become semi-transparent to indicate that you are in drag mode.

Known issue: You should not try to drag the DivX Connected server window as the server may freeze.

Download ConnectedVNC from DivX Connected plug-in library
Take a look at the DivX Connected set-top box

Getting the most from ConnectedVNC

Changing Windows' screen resolution can improve your PC-on-TV experience

One of the biggest drawbacks of using your PC on your TV is that things that look great when you’re sat 30-40cm (12-16″) from your monitor, often look rather small when you’re sat several meters away on the sofa.

The quickest way to improve the situation is to change the screen resolution used by Windows to something more similar to your television to make everything larger and remove any black borders you may see around the picture. The best resolution will ultimately depend on the size of your TV, but we recommend trying:

  • 800 x 600 for SD TVs
  • 1280 x 720 for HD TVs (or 1366 x 768 if that’s not available)

To change the screen resolution in Windows XP, right-click anywhere on the Desktop to bring up the Display control panel and select Properties then the Settings tab. In Windows 7/Vista, right-click on the Desktop and select Screen resolution.

With the Display control panel still open, you will also have the opportunity to increase the size of the text and icons used by Windows. In Windows XP, select the Appearance tab and change the Font Size option at the bottom of the dialogue. In Windows 7/Vista, click “Make text and other items smaller or larger”.

If you are using ConnectedVNC to browse the web, zoom controls are available by selecting View > Zoom from the menu in Firefox, or by clicking on the magnifying glass in the bottom-right corner of Internet Explorer.

Download ConnectedVNC from DivX Connected plug-in library
Take a look at the DivX Connected set-top box

ConnectedVNC now available for DivX Connected

ConnectedVNC is a free VNC client that allows you to control your Windows PC from your television using your DivX Connected set-top-box.

What’s it for?

ConnectedVNC allows you use your PC from your TV, so you can do things like check your email and browse the web without having to leave the comfort of your arm chair.

Requirements

To use the ConnectedVNC plug-in, you need to install a VNC server on the same PC as the DivX Connected server software; we recommend UltraVNC.

Once installed, open Admin Properties by right-clicking on the system tray icon, create a password (middle-left), tick the box next to “Allow Loopback Connections” (top-left) and click OK.

That’s it! You’re ready to use ConnectedVNC.

Getting Started

To use ConnectedVNC, simply navigate to the Plug-ins menu, or press the orange button on your remote control, and select ConnectedVNC.

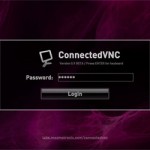
On the first screen, highlight the password box and press ENTER on your remote control to bring up the on-screen keyboard and enter your password, then navigate to DONE and press enter. Now, simply press down on your remote control to highlight the Login button and press ENTER.

If you have entered the correct password, the desktop of your PC should appear.

Remote Control

  • ARROWS = Move the mouse up/down/left/right
  • ENTER = Left mouse click
  • MENU = Right mouse click
  • PAGE UP/DOWN = Scroll up/down
  • DELETE = Backspace key
  • NUMBERS = Number keys (0-9)

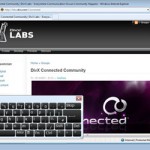
For additional keyboard input, we recommend using Windows’ on-screen keyboard:

Error Messages

After you click the Login button, you might see a “Connection Error” or “Invalid Password” error; a connection error usually occurs because the VNC server is not running or is being blocked by a firewall.

Either way, simply press BACK to try again.

Download & Find Out More

ConnectedVNC contains code from the FVNC project.

Configuring Windows Server 2003 for Mesmotronic Multiuser Server

Mesmotronic Multiuser Server 2
Whether you’re intending to run Mesmotronic Multiuser Server 2 on a low-cost virtual private server (VPS) or a more powerful dedicated server, chances are that it will be running Windows Server 2003.

Unlike the various desktop editions of Windows (XP, Vista and 7), you can’t simply an exception to the Windows Firewall settings or wait for the access dialogue to appear. Instead, you’ll need to update the Local Security Settings by running “secpol.msc /s” from the command line or Run… option on the Start menu; by default, Mesmotronic Multiuser Server uses port 2040 for applications and 2080 for administration.

The next step is to make the Admin Console available remotely by creating a virtual directory on one of your websites which points to the admin folder in the Mesmotronic Multiuser Server installation directory:

  1. Open the Internet Information Services (IIS) Manager, found under Start > Administrative Tools
  2. Expand Web Sites, in the left hand column, and click on the website that you would like to add the virtual directory to
  3. Right click in an empty area of the right hand pane and select New > Virtual Directory… from the menu
  4. Use the wizard to create a new virtual directory, entering an alias on the second screen, e.g. “admin”, and the full path to the admin folder on the third, usually C:\Program Files (x86)\Mesmotronic\Mesmotronic Multiuser Server 2\admin

Finally, you should change the admin password, “password” by default, by opening the admin console in a web browser and selecting the Configuration tab.

And that’s all there is to it.

There’s more information about how to configure Mesmotronic Multiuser Server here and if you don’t already have a server, there are a wide range of options available here.

Introduction to server-side applications for Mesmotronic Multiuser Server

Mesmotronic Multiuser Server 2
Server-side applications can add vital functionality to multiuser applications and games created using Mesmotronic Multiuser Server 2, including the ability to load and save files, communicate between rooms and applications, and push data to clients.

A server-side application is a standard ActionScript 3 SWF like any other, except that it cannot display any graphics and extends the MultiuserServerApplication class, rather than Sprite or MovieClip. Applications can therefore be created using any ActionScript 3 IDE, including Flex/Flash Builder, Flash CS3/4 and FlashDevelop.

In this tutorial, we’re going to create a very simple server-side application which sends, on request, a random colour to the client which the client will then apply to the stage. As usual, we’re assuming you have a reasonable working knowledge of ActionScript 3 and have Mesmotronic Multiuser Server installed locally, with the API added to your library path.

The first step in creating any new server-side application is to create a new document class which extends MultiuserServerApplication. Your initial class structure would typically look something like this:

package
{
    import com.multiuserserver.server.MultiuserServerApplication;

    public class RandomColourApp extends MultiuserServerApplication
    {
        override public function main():void
        {
            // Entry point
        }
    }
}

The main entry point is called immediately after the application property of your class (inherited from MultiuserServerApplication) has been initialized, enabling you to communicate with the outside world, and should be used in preference to a class constructor. Although we won’t be doing anything here in this tutorial, this is where you would normally configure your application and add any event listeners you may require.

By default, all calls made to the server by clients, via the MultiuserServerClient call method, will invoke public functions of your application class. So, to allow clients to request a random colour, we need to add a function called getColour:

package
{
    import com.multiuserserver.server.MultiuserServerApplication;

    public class RandomColourApp extends MultiuserServerApplication
    {
        override public function main():void
        {
            // Entry point
        }

        public function getColour():uint
        {
            return Math.round(Math.random()*0xFFFFFF);
        }
    }
}

Now that the function is in place, you simply need to publish your class in the usual way and copy the resulting SWF, RandomColourApp.swf, to a folder of the same name within the applications directory of Mesmotronic Multiuser Server. Based on the default installation folder, this would be:

 C:\Program Files\Mesmotronic\Mesmotronic Multiuser Server\applications\RandomColourApp\

Once copied, your application is ready to go.

Now, all we need to do is create a simple client application to test that our server-side application works (the elements which relate to the server call are highlighted):

package
{
    import com.multiuserserver.events.MultiuserServerEvent;
    import flash.events.IOErrorEvent;
    import flash.events.MouseEvent;

    public class RandomColourClient extends Sprite
    {
        public var client:MultiuserServerClient;

        public function RandomColourClient()
        {
            client = new MultiuserServerClient();
            client.addEventListener(MultiuserServerEvent.CONNECT, onConnect);
            client.addEventListener(IOErrorEvent.IO_ERROR, onIOError);
            client.delegate = this;
            client.connect("localhost", 2040, "RandomColourApp", 10);

            stage.addEventListener(MouseEvent.CLICK, onClick);
        }

        public function onConnect(event:MultiuserServerEvent):void
        {
            trace("Connected!");
        }

        public function onIOError(event:Event):void
        {
            trace("Connection Error.");
        }

        public function onClick(event:MouseEvent):void
        {
            client.call("getColour", null, "setColour");
        }

        public function setColour(colour:uint):void
        {
            graphics.clear();
            graphics.beginFill(colour);
            graphics.drawRect(0, 0, stage.stageWidth, stage.stageHeight);
        }
    }
}

Publish the class above and you will find that every time you click on the stage it will change to the colour received from the server!

Obviously, this is just scratching the surface of what’s possible with server-side applications, but it should give you a good idea of how basic client-server interaction can be implemented.

We’ll be taking a look at more advanced functionality at a later date, but if you’d like to find out more in the mean time, there are several examples included with your Mesmotronic Multiuser Server installation (follow the link on your start menu), which are also available as a separate download.
Flex data binding with Mesmotronic Multiuser Server

Mesmotronic Multiuser Server 2
If you’re creating client applications for Mesmotronic Multiuser Server 2 in Flex 3 or 4, it’s worth noting that almost all of the properties of both the MultiuserServerClient and MultiuserServerClientInfo classes are bindable.

Why is this useful? It means you can create things like connection status indicators or display the client and room ID without having to add any additional event handlers to your code.

For example, if you have a button that should only be available to users when they’re connected to the server, you can simply bind the enabled property of the button to the connected property of an instance of MultiuserServerClient, in this case client:

<mx:Button label="Enabled when connected" enabled="{client.connected}" />

Or, alternatively:

<mx:Binding source="client.connected" destination="myButton.enabled" />

This is equally true of all MultiuserServerClientInfo class properties, which is accessed via the info property of any MultiuserServerClient instance:

<mx:Label text="{client.connected ? 'You are in room '+client.info.room : 'You are not connected'}" />

If you’re new to Flex data binding, Adobe has a quick start guide here.

Make it Mesmotronic